How to Edit A Canva Website Template – Full Video Tutorial
If you’ve just purchased an editable Canva website template from Gin & Gemini, or you want to check out what’s involved in the editing process before you buy, welcome!
This guide walks you through everything you need to know to customize your site and get it ready to share with your guests — whether you’re planning a baby shower, a wedding, or any other celebration.
You can choose to watch the video below, or follow the written guidelines, all handily timestamped throughout the post.
While this example uses a baby shower template, don’t worry if yours looks completely different. Every element works the same way across all our templates, so you can follow along regardless of your design.
0.00 Getting Started: The Front Page
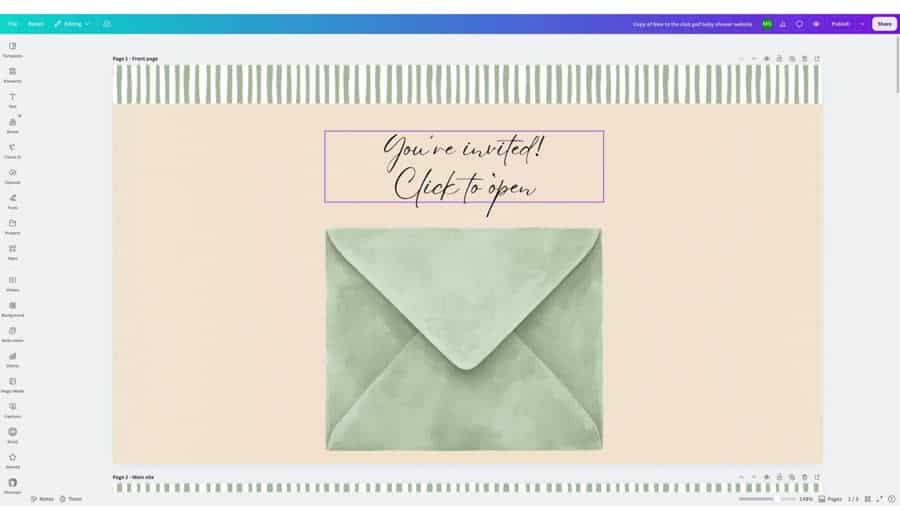
Your website’s front page is designed to build a little anticipation. Guests will see a clickable graphic (in this example, an envelope) that they click to “open” and reveal the invitation.
A quick note on links: this front-page element is already linked to page two of your site, so guests can access the main content. There’s generally no reason to unlink it — but if you’re curious how it works, click the three dots on the object and choose Link. Since it’s already linked, you’ll see it says Edit Link instead, showing you exactly where it points.
1.06 Customizing Design Elements
From here, editing works exactly like any other Canva template:
- Text and fonts: Highlight any text to change the wording, font style, or size.
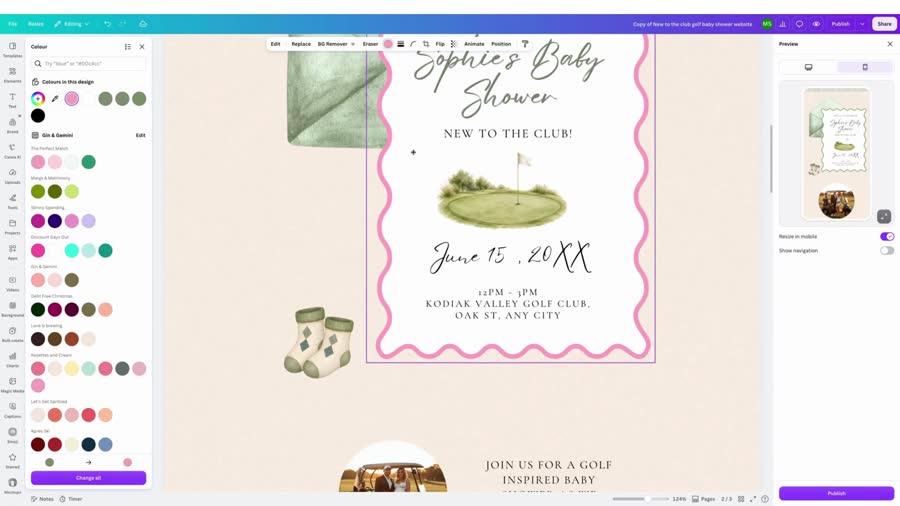
- Colors: Click on any element or the background to swap in a new color.
- Backgrounds: Click the background and choose a different color, or replace decorative elements (like a top banner stripe) with a new pattern — either from Canva’s element library or your own uploads. Simply drag your chosen image into place.
Feel free to add extra graphics or decorative touches to the front page as well.
2.04 Editing the Main Page & Mobile View
Page two is the heart of your site — this is what guests land on after clicking through the front page. It’s built as a long, scrollable page (similar to an infinite scroll).
2.20 Checking the mobile view: Since most of your guests will likely view the site on their phones, it’s important to check how things look on mobile as you edit. Click the eye icon to toggle between desktop and mobile previews. You’ll notice extra space built into the design — this is intentional, to make sure everything displays properly on smaller screens.
A word of caution: As you move or resize elements, watch the purple selection boxes that appear around graphics. If elements start to overlap, it may not look different on desktop, but it can cause things to distort or jumble together on the mobile view. Always double-check your mobile preview after making changes — something that looks great on desktop might need tweaking for phones.
4.18 Linking to Google Maps and Websites
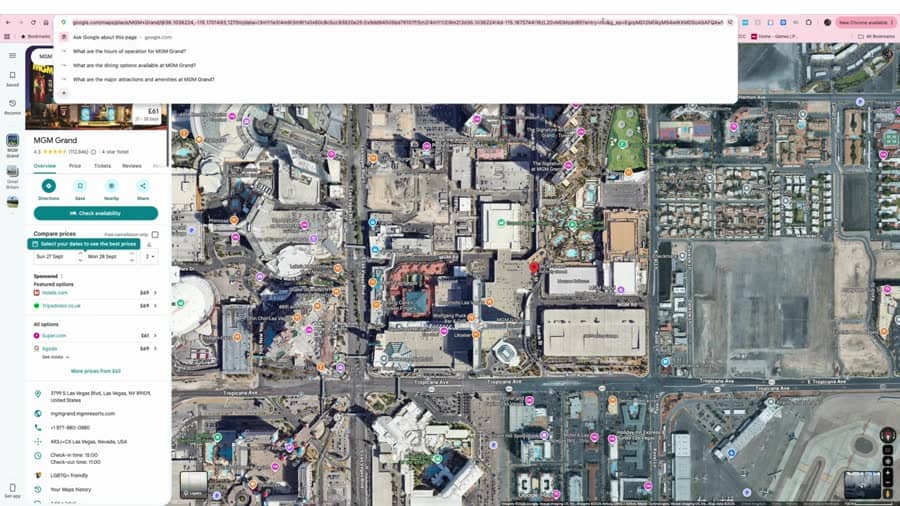
For details like your venue location, you’ll want to link to Google Maps:
- Find your venue on Google Maps.
- Copy the location URL from the address bar (don’t worry that it looks long).
- Back in Canva, highlight the relevant text.
- Click Link, paste the URL, and press Done.
Do the same process for linking to a venue’s website — copy the URL and link it to the corresponding text.
5.30 Setting Up Your RSVP Form, Editing the form and Viewing Responses
Your RSVP form is built directly into your Canva website (no need for a separate Google Form, though you can swap one in if you prefer).
How it works: The RSVP text links to page three of your site — a hidden page guests only reach by clicking that link.
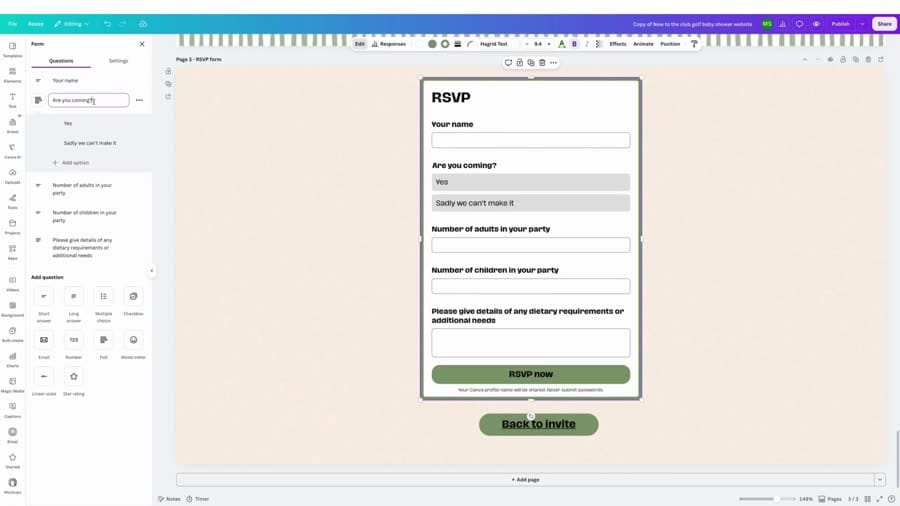
6.00 – Editing the form:
- Click on the form, then click Edit.
- Update any question wording as needed.
The default form includes:
- Number of adults
- Number of children
- Dietary or additional needs
Adding new questions: Click Add question to include more fields — you can choose short answer, long answer, number, or poll-style (yes/no) formats.
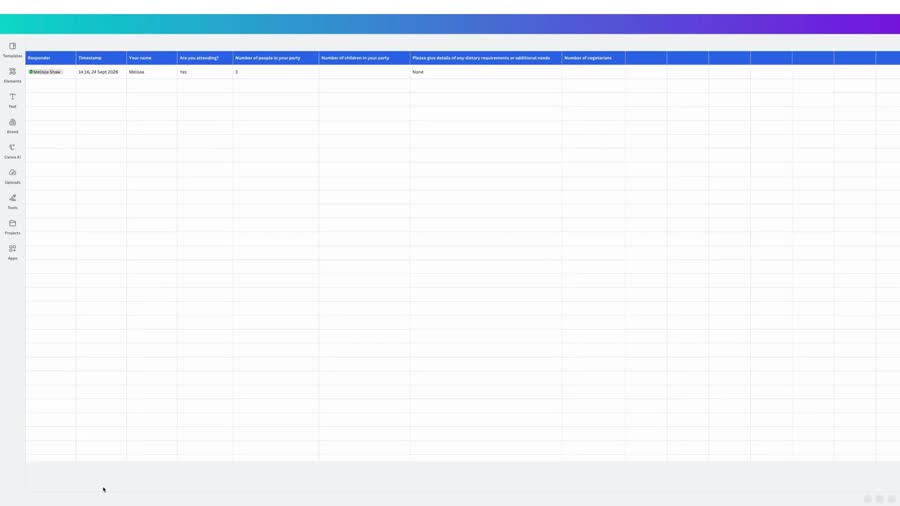
7.20 Viewing responses: Once your site is live and guests start responding:
- Click on the form again — you’ll notice the top menu changes.
- Click Responses to see how many replies you’ve received, or View responses.
- For an easier overview, link the form to a sheet — this creates a spreadsheet (similar to Excel or Google Sheets) within Canva that automatically populates with responses. This makes tracking RSVPs far simpler than scrolling through individual replies, and it’s completely private — guests never see this data.
All of this works on Canva’s free plan — no upgrade required.
9.20 Linking Other Elements to the RSVP Page
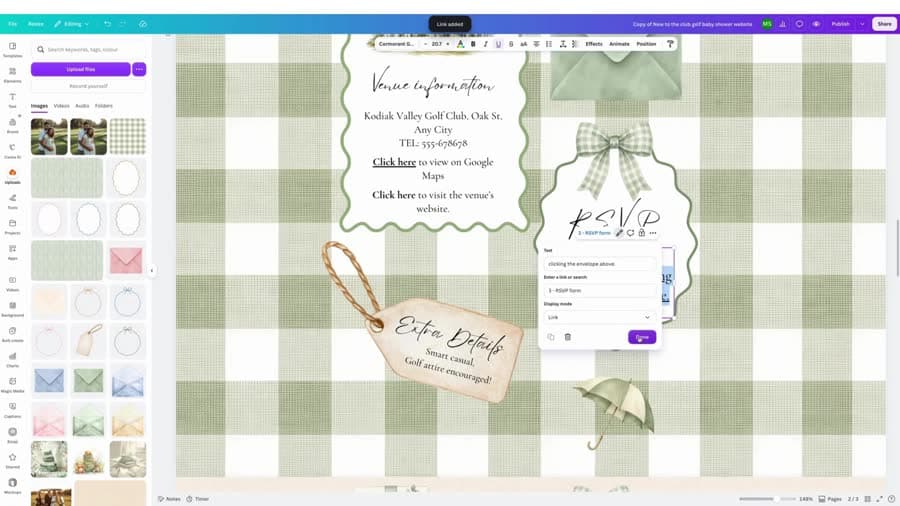
You’re not limited to one RSVP link. You can link any object or text to page three:
- Highlight the object or text.
- Click More (or the three dots), then Link.
- Select page three from the list.
This works for graphics (like a decorative bow) or text (like a “Click here to RSVP” prompt).
9.55 How to Create a QR Code to link to a URL such as a gift registry
Get your external link ready and copy it to the clipboard.
On the left hand side Canva menu, click “Apps” and search “Static QR Code”. (as the video mentions, be aware of 3rd party QR code generators that may charge you, the Static QR code app is free and simple to use.
Paste your URL into the box and the QR code will be generated. You can then drag this into position on your website.

11.50 How To Upload Your Own Photos to Canva
Firstly, ensure you have a digital copy of the photos you would like to upload and know their file location on your computer.
Click “Upload” from the left hand menu. Navigate to the correct folder on your computer and select the photo to upload. Click open and it should upload into your Canva uploads so you can drag it into your design.
13.20 How to Publish the website
Once you’re happy with how everything looks on both desktop and mobile, you can publish your website completely for free. Navigate to the top right hand side and click “Publish”. Canva will give you a suggested URL for free – if you wish to use a custom URL you could use a service like bit.ly which offers a limited free plan.
Does everything have to be perfect before I publish?
No – don’t worry! You can easily make any changes within Canva and then hit “Republish” to update as many times as you need. You can also choose to unpublish the site once the event is over, or you could edit the contents to share a thankyou message to guests, plus photos and videos from the party.
View our sample site
If you wish to view the example from the video, click here to explore how it works in real time.
Explore our editable Canva Templates on Etsy
Visit the Gin& Gemini website to view our range of templates!
Visit the Gin & Gemini Etsy Shop and Save 25%
For any of the Gin & Gemini products featured in this post, please visit us on Etsy! Buy 3 digital products, get 25% off (discount automatically applied at checkout).

Follow us on socials
About The Author

Melissa is an Educational Consultant in the UK with over 25 years teaching experience. Through her expertise in creating educational resources for children she opened her Etsy shop, Gin&Gemini, in 2022 and quickly expanded her offering into the party planning niche, offering a range of physical and digital products for children’s parties, family celebrations, holidays and the bachelorette / hen party niche. She lives on a farm with her husband, young daughter and cats.
In addition to our own products, this post may contain affiliate links, meaning I get a commission if you decide to make a purchase through my links, at no cost to you. Please read our disclosure policy for more details.
As an Amazon Associate, I earn from qualifying purchases.


